Materials for today's OYW - 1 pair of old blue jeans, and a little imagination.
Showing posts with label crafting. Show all posts
Showing posts with label crafting. Show all posts
Wednesday, March 21, 2012

Thursday, February 23, 2012
Saturday, February 18, 2012
February Craftivism Challenge - Knit HeartScarf Pattern
Let's practice our knitting skills some more, and learn something new...
Thursday, January 12, 2012
Tea for Tuesday (Well, Thursday) - and a Tutorial Two-fer
Wow, that's a tongue twister! Two great tutorials today - grab a crochet hook and some yarn and let's go!
Wednesday, January 11, 2012
One Yard Wednesday - A Ray of Sunshine
A cute little bag in bright sunny yellow - to cheer the drear, and haul the keys. And the cell phone. And the wallet. Or maybe your lunch? For only a yard of fabric.
Friday, January 6, 2012
Opportunity to Save $$ on Craft and Sewing Supplies
If you are a teacher or homeschooler, this weekend is a great chance to save some extra $$$ on sewing and crafting supplies. JoAnn Fabrics is having their Teacher Appreciation Days on Saturday and Sunday. Sign up for your card, and save 20% off your entire purchase.
Remember your new mantra: On Sale and With a Coupon. Here's a guaranteed coupon every time you visit. Just show your card and get 15% off your entire purchase every single day. Save even more on Teacher Appreciation Days.
Oh, and the real bonus - Michael's also accepts your teacher discount card. Save 15% there, too.
Use this for purchasing supplies for our Craftivism Challenge coming up tomorrow!
Remember your new mantra: On Sale and With a Coupon. Here's a guaranteed coupon every time you visit. Just show your card and get 15% off your entire purchase every single day. Save even more on Teacher Appreciation Days.
Oh, and the real bonus - Michael's also accepts your teacher discount card. Save 15% there, too.
Use this for purchasing supplies for our Craftivism Challenge coming up tomorrow!
Another Way to Choose Fabrics
Let's go back to art class - it was one of my favorite classes in school!
Thursday, January 5, 2012
How to Buy Fabrics That Coordinate with Each Other
Maybe you are new to sewing and quilting, or it's one of your New Year's goals to learn. I'd like to show you a little trick I learned a long time ago that will help you when you go to buy fabrics.
Wednesday, January 4, 2012
One Yard Wednesday - Wall Art for Princess
The Embroidery Hoop as frame/wall art craze is running rampant all over the internet! Here's how to make your own...
Thursday, November 17, 2011
T-shirt Yarn Tutorial - Part 2 - So What Do I Do with the Leftovers?
So once you've made your yarn, your left with this:

Use it to make sweeper covers! You will get 2 of them from your leftovers.
Fold it in half, and remove the sleeves...


...and the neck.

Next, measure your duster/sweeper. Mine is 10" long by about 4" wide. I added 2" to each side to be able to wrap the t-shirt material up and over, and to then be able to tuck it into the little holes.

I cut mine 6" wide...

...by 14" long.
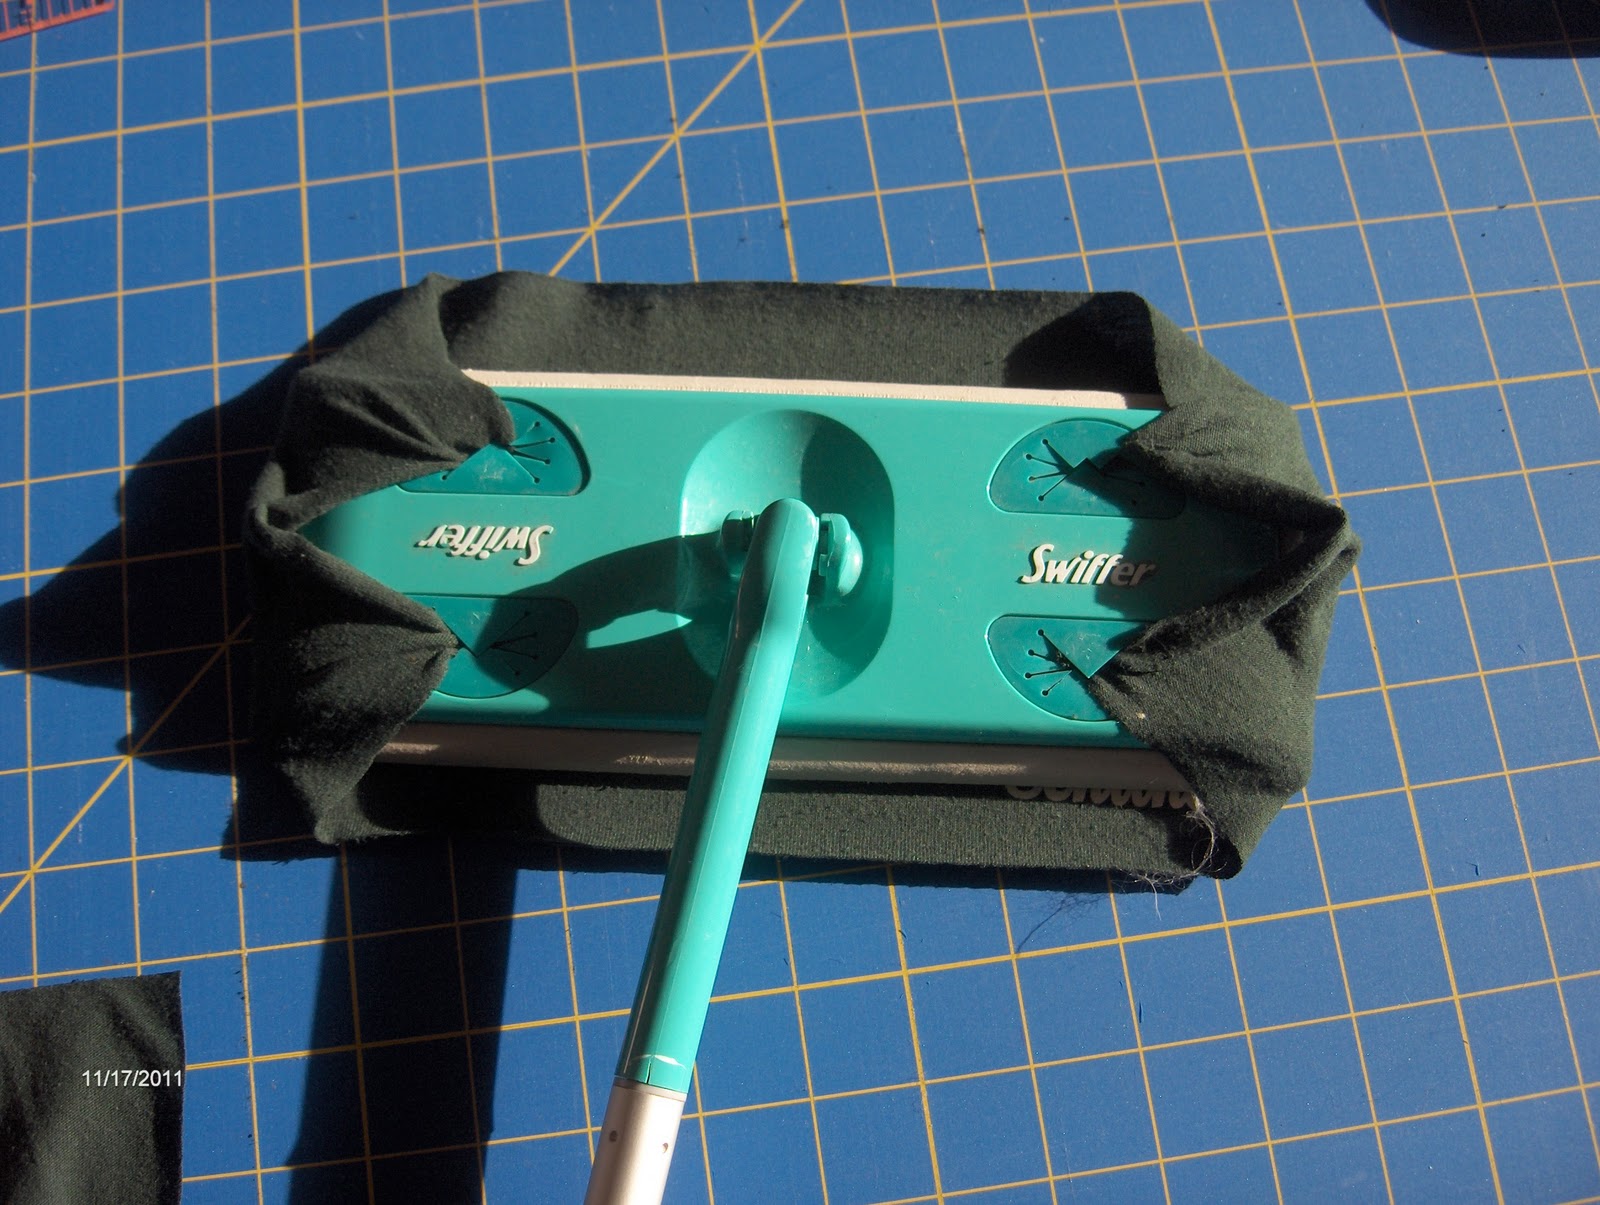
Also, there were a few pieces (little strips from hem and leftovers of main rectangles, collar) that I could not use. I went ahead and pitched these in the trash. I left the sleeves whole, and can use them for cleaning mirrors and windows instead of paper towels (I use one wet, and then go over everything with the other dry).
Happy t-shirting!
Wednesday, November 16, 2011
T-Shirt Yarn Tutorial
My favorite online forum is Mary Jane's Farmgirl Connection. It's for gals like me who do "farmwife" stuff, whether we live on a farm or just dream about living on a farm.
One of the posts today was about repurposing clothing, with a specific question about t-shirt yarn. So, I thought I'd share the process with all of you. This is a fantastic way to reuse shirts that may not be suitable for charity donation because of stains, holes, stretching - you know the ones I'm talking about. By cutting them into strips, you can eliminate the holey or stained sections and still use what is good.
Materials:
T-shirt(s)
Cutting mat, quilt ruler and rotary cutter OR
Yardstick, 1-foot ruler, marking utensil (tailor's chalk, pencil) and scissors
Hubs generously donated this t-shirt for the tutorial. Kind of appropriate, doncha think?

Start by folding your t-shirt in half, and laying it flat and smooth. Be sure to smoothe out as many wrinkles as you possibly can.

Start cutting from the hem end. Cut the hem off, and make the lower edge straight. From here on, for the cutting, if you are using the yardstick method, use the smaller ruler and mark lightly on both edges, every 1/2". Then carefully line up your yardstick to match each mark. Cut with scissors. Repeat the lining up and cutting.
My photos show how to do it with the rotary cutter.

Continue cutting all the way up to the base of the sleeves (aka the armpits - can you say that on a blog?). You will have a bunch of long loops. I got 29 out of a size medium shirt. If you don't mind some shorter segments in your finished product, you can repeat either process with the sleeves (without folding them in half first).

Now this is the part I could not explain in words only, so follow the photos if the directions seem confusing...
To make these loops into yarn, you are going to connect them with larkshead knots (thank you, Bubba - I knew there was a reason we have you in Boy Scouts!). Take 2 loops. Open one of them up. This will be Loop A. Insert Loop B as shown.

Now take the "tail" of Loop B and insert it THROUGH the front of itself, going over the end of Loop A.


Pull tight to make the knot.

Continue with all the loops until you have joined the last one. Be sure to attach at the ends of each loop - not in the middle or you will have "saggy" sections and tight sections (don't ask me how I know this - I will plead the 5th!) Wind carefully into a ball. This "yarn" has a lot of stretch to it, and you don't want to overstrectch it.
Make as little or as much as you want. Make lots of colors - when following a pattern, joining Color A to Color B is as simple as another larkshead knot. You can make a variegated (aka multi-color) using loops from different shirts, or mixing sleeve loops from one shirt with big loops from another. Make rugs, bags, baskets, scarves - anything that would take a bulky or rug weight yarn - whatever your imagination wants to try!
Give it a go the next time you have a pile of old t-shirts!
One of the posts today was about repurposing clothing, with a specific question about t-shirt yarn. So, I thought I'd share the process with all of you. This is a fantastic way to reuse shirts that may not be suitable for charity donation because of stains, holes, stretching - you know the ones I'm talking about. By cutting them into strips, you can eliminate the holey or stained sections and still use what is good.
Materials:
T-shirt(s)
Cutting mat, quilt ruler and rotary cutter OR
Yardstick, 1-foot ruler, marking utensil (tailor's chalk, pencil) and scissors
Hubs generously donated this t-shirt for the tutorial. Kind of appropriate, doncha think?

Start by folding your t-shirt in half, and laying it flat and smooth. Be sure to smoothe out as many wrinkles as you possibly can.

Start cutting from the hem end. Cut the hem off, and make the lower edge straight. From here on, for the cutting, if you are using the yardstick method, use the smaller ruler and mark lightly on both edges, every 1/2". Then carefully line up your yardstick to match each mark. Cut with scissors. Repeat the lining up and cutting.
My photos show how to do it with the rotary cutter.

Removing the hem
Continue cutting all the way up to the base of the sleeves (aka the armpits - can you say that on a blog?). You will have a bunch of long loops. I got 29 out of a size medium shirt. If you don't mind some shorter segments in your finished product, you can repeat either process with the sleeves (without folding them in half first).

Now this is the part I could not explain in words only, so follow the photos if the directions seem confusing...
To make these loops into yarn, you are going to connect them with larkshead knots (thank you, Bubba - I knew there was a reason we have you in Boy Scouts!). Take 2 loops. Open one of them up. This will be Loop A. Insert Loop B as shown.

Now take the "tail" of Loop B and insert it THROUGH the front of itself, going over the end of Loop A.


Pull tight to make the knot.

Continue with all the loops until you have joined the last one. Be sure to attach at the ends of each loop - not in the middle or you will have "saggy" sections and tight sections (don't ask me how I know this - I will plead the 5th!) Wind carefully into a ball. This "yarn" has a lot of stretch to it, and you don't want to overstrectch it.
Make as little or as much as you want. Make lots of colors - when following a pattern, joining Color A to Color B is as simple as another larkshead knot. You can make a variegated (aka multi-color) using loops from different shirts, or mixing sleeve loops from one shirt with big loops from another. Make rugs, bags, baskets, scarves - anything that would take a bulky or rug weight yarn - whatever your imagination wants to try!
Give it a go the next time you have a pile of old t-shirts!
Subscribe to:
Posts (Atom)